INTERNAL: Converting RNO files into RNO EMV file format in MMS
Last Updated:What's in this article?
Products
MMS
Description
Some integrations will require EMV to be activated in MMS please follow the steps below to ensure that EMV is active on this file.
Resolution
- Ensure that the gateway is on an EMV front end (if not please make sure that all batches are settled on that gateway before switching the front end)

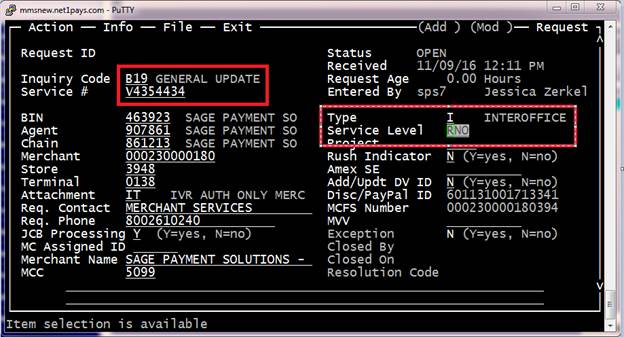
- Log into MMS and start a general update
- Press A to add file, Inquiry code is “B19”

- Type should be “I”
- Ctrl + V to save file, press “P” to move to the terminal side
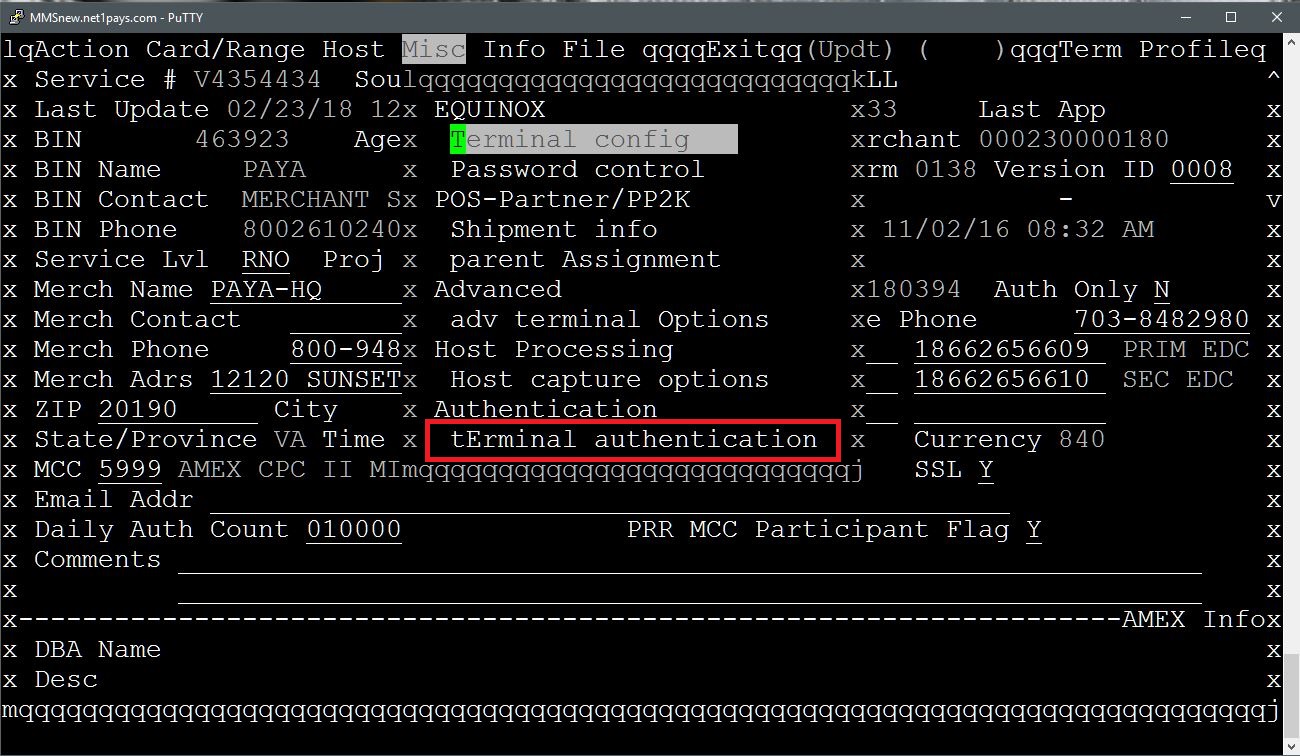
- Arrow over to the right and select Misc, and press the up arrow 1 time to get to terminal authentication.

- If there are stars across the terminal authentication field then the code has been set up as SAGE123 (with 4 spaces behind it)
- If this is blank go back to the Action menu and select Update.
- Go back to the Misc menu and select Terminal Authentication again.
- If you are setting up a Paya Connect file change the authentication code to PAYA123456, for all other paya gateways set the authentication code to SAGE123 (followed by 4 spaces)
- Then Control + V to Save
- Control + E to exit the terminal page of the file
- Navigate to the Action menu and select Close
- the resolution code is 82 for general update
- notate the authentication code used for the file and Control + V to Save
